Let me tell you something, folks. Caramel balayage is not just a hair color—it's a lifestyle. It's that perfect blend of warmth, texture, and elegance that screams "I woke up like this, but I actually put in effort." If you're even slightly interested in upgrading your locks, this is the ultimate guide you need. Whether you're a beginner or a seasoned hair enthusiast, we've got everything you need to know about caramel balayage right here.
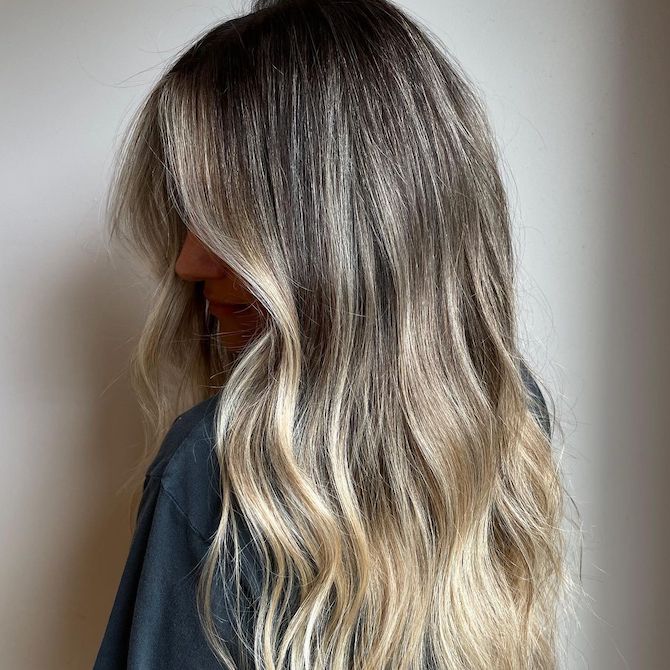
Now, let's get one thing straight—caramel balayage isn't just for fairytale princesses or Instagram models. It's for anyone who wants to add a touch of sun-kissed charm to their hair. Think about it: soft, golden tones melting seamlessly into your natural color, creating an effect that looks like you spent a summer at the beach. Who wouldn't want that?
And guess what? This trend isn't going anywhere anytime soon. It's been around for years, and yet, it continues to evolve and adapt to different styles and preferences. From subtle highlights to bold transformations, caramel balayage has something for everyone. So buckle up, because we're diving deep into the world of caramel balayage, and trust me, you're going to love it.
Read also:Shirley Jones Celebrating The Life And Career Of An Iconic Actress
What Exactly is Caramel Balayage?
Alright, let's break it down. Caramel balayage is a hair coloring technique that focuses on creating a natural, sun-kissed look by applying lighter shades of caramel to your hair. The balayage method itself is all about hand-painting the color onto strands of hair, giving it that effortless, gradient effect that's so popular right now.
Unlike traditional highlights, which can sometimes look harsh or too uniform, balayage is all about blending. The result? A softer, more dimensional look that mimics the way sunlight naturally hits your hair. And when you add caramel into the mix, you get these warm, golden tones that just scream luxury.
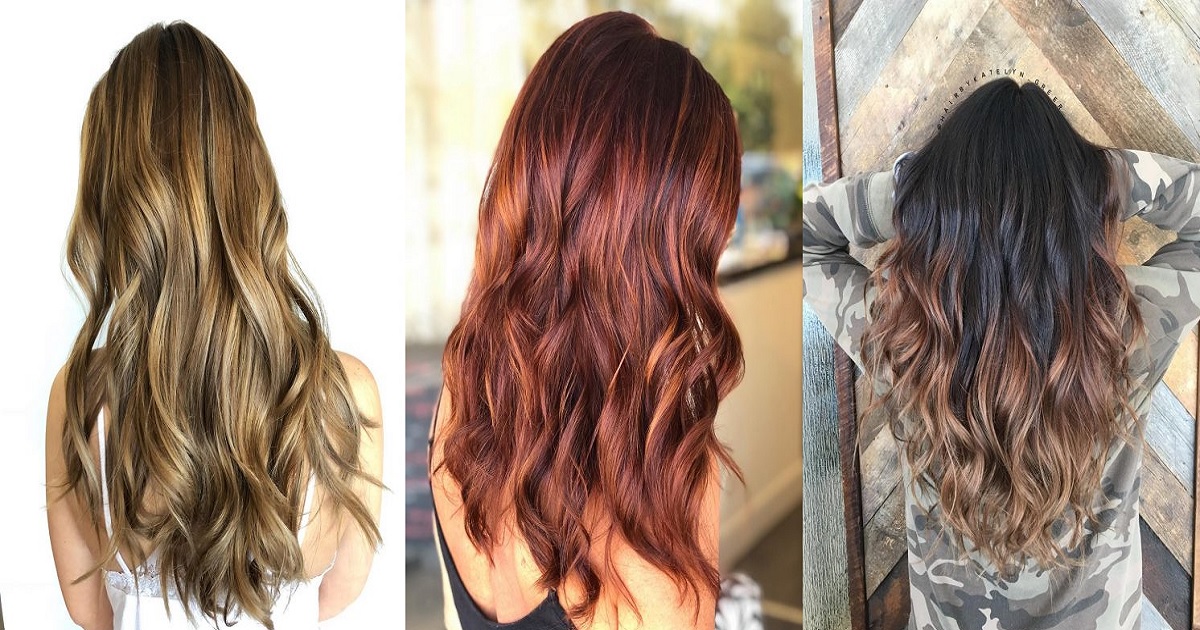
Now, here's the kicker: caramel balayage isn't just for blonde or brunette hair. It works beautifully on redheads, black hair, and even silver foxes. The key is finding the right shade of caramel that complements your natural color and skin tone. And don't worry—we'll get into that later.
Why Should You Consider Caramel Balayage?
Let's be real, folks. Hair is a big deal. It's one of the first things people notice about you, and it can completely transform your look. Caramel balayage offers so many benefits that it's hard not to consider it. For starters, it gives your hair that "I just came back from a tropical vacation" vibe without the actual vacation. How cool is that?
Another perk? It's super low-maintenance compared to other coloring techniques. Since balayage is designed to grow out naturally, you don't have to worry about those harsh roots showing up after a few weeks. Plus, the caramel tones tend to fade beautifully, so even as your color evolves, it still looks great.
And let's not forget about the versatility. Whether you want a subtle change or a dramatic transformation, caramel balayage can be customized to fit your style. It's like a chameleon for your hair—always adapting and looking fabulous.
Read also:Ancestry Of Targaryens A Comprehensive Lineage Unveiled
Choosing the Right Caramel Shade
Now, here's where things get a little tricky. Not all caramel shades are created equal, and finding the right one for you is crucial. The key is to consider your skin tone and natural hair color. If you're fair-skinned, you might want to go for lighter caramel tones that won't overpower your complexion. On the other hand, if you have deeper skin tones, darker caramel shades can add a rich, luxurious depth to your hair.
Here are some tips to help you choose:
- For fair skin: Opt for soft, buttery caramel shades that complement your natural glow.
- For medium skin: Try golden caramel tones that add warmth without washing out your features.
- For dark skin: Go bold with rich, deep caramel shades that enhance your natural beauty.
And remember, it's always a good idea to consult with your stylist. They can help you find the perfect shade that works with your hair texture and lifestyle.
Preparing for Your Caramel Balayage
Before you dive headfirst into caramel balayage, there are a few things you should know. First and foremost, make sure your hair is in good condition. If your strands are already damaged or over-processed, the coloring process might not turn out as smoothly as you'd like. Consider doing a deep conditioning treatment or using hair masks to strengthen your locks beforehand.
Another important factor is your current hair color. If you have dark hair, you might need to lighten it a bit before applying the caramel tones. This is where a professional stylist comes in handy. They can assess your hair and determine the best approach to achieve the desired result.
Lastly, be prepared for a little downtime. Caramel balayage is a process that takes time, so don't rush it. Whether you're doing it at home or visiting a salon, give yourself enough time to enjoy the experience and let the color set properly.
DIY vs. Salon: Which is Better?
Alright, let's address the elephant in the room. Should you attempt caramel balayage at home, or is it better to leave it to the professionals? Honestly, it depends on your skill level and confidence. If you're a seasoned DIYer with experience in hair coloring, you might be able to pull it off. But if you're new to the game, it's probably safer to visit a salon.
Here are the pros and cons of each option:
DIY Caramel Balayage
- Pros: Cost-effective, convenient, and customizable to your liking.
- Cons: Risk of uneven application, potential for mistakes, and limited access to professional-grade products.
Salon Caramel Balayage
- Pros: Expert application, high-quality products, and guaranteed results.
- Cons: More expensive, requires scheduling, and less control over the process.
Ultimately, the choice is yours. Just weigh the options carefully and decide what works best for your budget and lifestyle.
How to Maintain Your Caramel Balayage
Once you've achieved that perfect caramel balayage, the real work begins. Maintaining it requires a bit of effort, but trust me, it's worth it. Here are some tips to keep your color looking fresh and vibrant:
- Use sulfate-free shampoos and conditioners to prevent color fading.
- Avoid over-washing your hair, as this can strip the color and lead to dryness.
- Protect your hair from the sun by wearing hats or using UV-protectant sprays.
- Deep condition regularly to keep your hair soft and healthy.
- Visit your stylist every 6-8 weeks for touch-ups, if needed.
And don't forget to embrace the natural growth process. One of the beauties of balayage is that it grows out gracefully, so don't stress too much about maintaining perfection.
Common Mistakes to Avoid
As with any hair trend, there are some common mistakes people make when it comes to caramel balayage. Let's go over a few of them so you can avoid them:
- Over-processing: Applying too much color or leaving it on for too long can damage your hair. Always follow the instructions or consult with a professional.
- Choosing the wrong shade: Picking a caramel shade that doesn't complement your skin tone can make your hair look washed out or too harsh. Stick to shades that enhance your natural beauty.
- Ignoring maintenance: Neglecting to care for your hair after coloring can lead to dullness and fading. Stay on top of your hair care routine to keep your color looking fresh.
By avoiding these pitfalls, you'll be well on your way to achieving that gorgeous caramel balayage look.
Caramel Balayage for Different Hair Types
Not all hair is created equal, and that's okay. Caramel balayage can work for every hair type, but the approach might differ slightly depending on your texture. Here's how to adapt the technique for various hair types:
Curly Hair
For curly hair, the goal is to enhance your natural texture while adding depth. Use a balayage technique that targets the mid-lengths and ends, leaving the roots untouched. This will create a soft, dimensional effect that complements your curls.
Straight Hair
Straight hair can benefit from caramel balayage by adding volume and texture. Focus on creating a gradient effect that transitions seamlessly from your roots to your ends. This will give your hair that coveted "lived-in" look.
Thick Hair
If you have thick hair, consider using a more intense caramel shade to make your color pop. Since thick hair can handle more color, you can go bold with your balayage application. Just be sure to balance it with your natural tone to avoid looking too artificial.
Cost Considerations
Let's talk money, folks. Caramel balayage can vary in cost depending on several factors, including the salon, the stylist's experience, and the complexity of the application. On average, you can expect to pay anywhere from $150 to $400 for a professional balayage session. DIY kits, on the other hand, can range from $20 to $50, but remember that they might not give you the same results as a salon visit.
And don't forget about maintenance costs. Touch-ups and hair care products can add up over time, so factor that into your budget as well. But hey, beautiful hair is worth the investment, right?
Conclusion
So there you have it, folks. Caramel balayage is more than just a hair trend—it's a way to elevate your entire look. From choosing the right shade to maintaining your color, there's a lot to consider, but the end result is always worth it. Whether you go the DIY route or visit a salon, remember to have fun with the process and embrace your unique style.
Now it's your turn. Are you ready to take the plunge and try caramel balayage for yourself? Leave a comment below and let us know what you think. And if you loved this guide, don't forget to share it with your friends and family. After all, great hair is something worth talking about!
Table of Contents
- What Exactly is Caramel Balayage?
- Why Should You Consider Caramel Balayage?
- Choosing the Right Caramel Shade
- Preparing for Your Caramel Balayage
- DIY vs. Salon: Which is Better?
- How to Maintain Your Caramel Balayage
- Common Mistakes to Avoid
- Caramel Balayage for Different Hair Types
- Cost Considerations
- Conclusion